Have you ever experienced your Android phone suddenly inundated with many contacts, only to realize that they were automatically synced from your Gmail account? While automatic contact syncing can be beneficial for keeping your address book up-to-date, it can also lead to clutter and confusion, especially if you unintentionally add unwanted contacts.
Fortunately, removing Gmail synced contacts from your Android phone is a straightforward process that allows you to regain control over your contacts and keep your device organized.
First, install the Google Contacts app if you haven’t already. Open the app, tap “Fix and Manage,” go to settings, scroll down, and select “Undo changes.” You can choose the timeframe from which you want to remove synced contacts, such as 10 minutes ago, 1 hour ago, yesterday, one week ago, or custom. SEE SCREENSHOTS BELOW.
In this step-by-step guide, we will walk you through the process of undoing the automatic contact sync and removing those Gmail contacts you do not want on your phone.
So, here’s how to undo it or delete Google/Gmail synced contacts on any Android.
A step-by-step tutorial with all the screenshots and videos.
How to Remove Google (Gmail) Synced Contacts from Android
Below is the straightforward procedure to undo the newly synced contacts on your device:
The first step is installing the Google Contacts app; if you already have it, that is great. Now, follow the steps carefully.
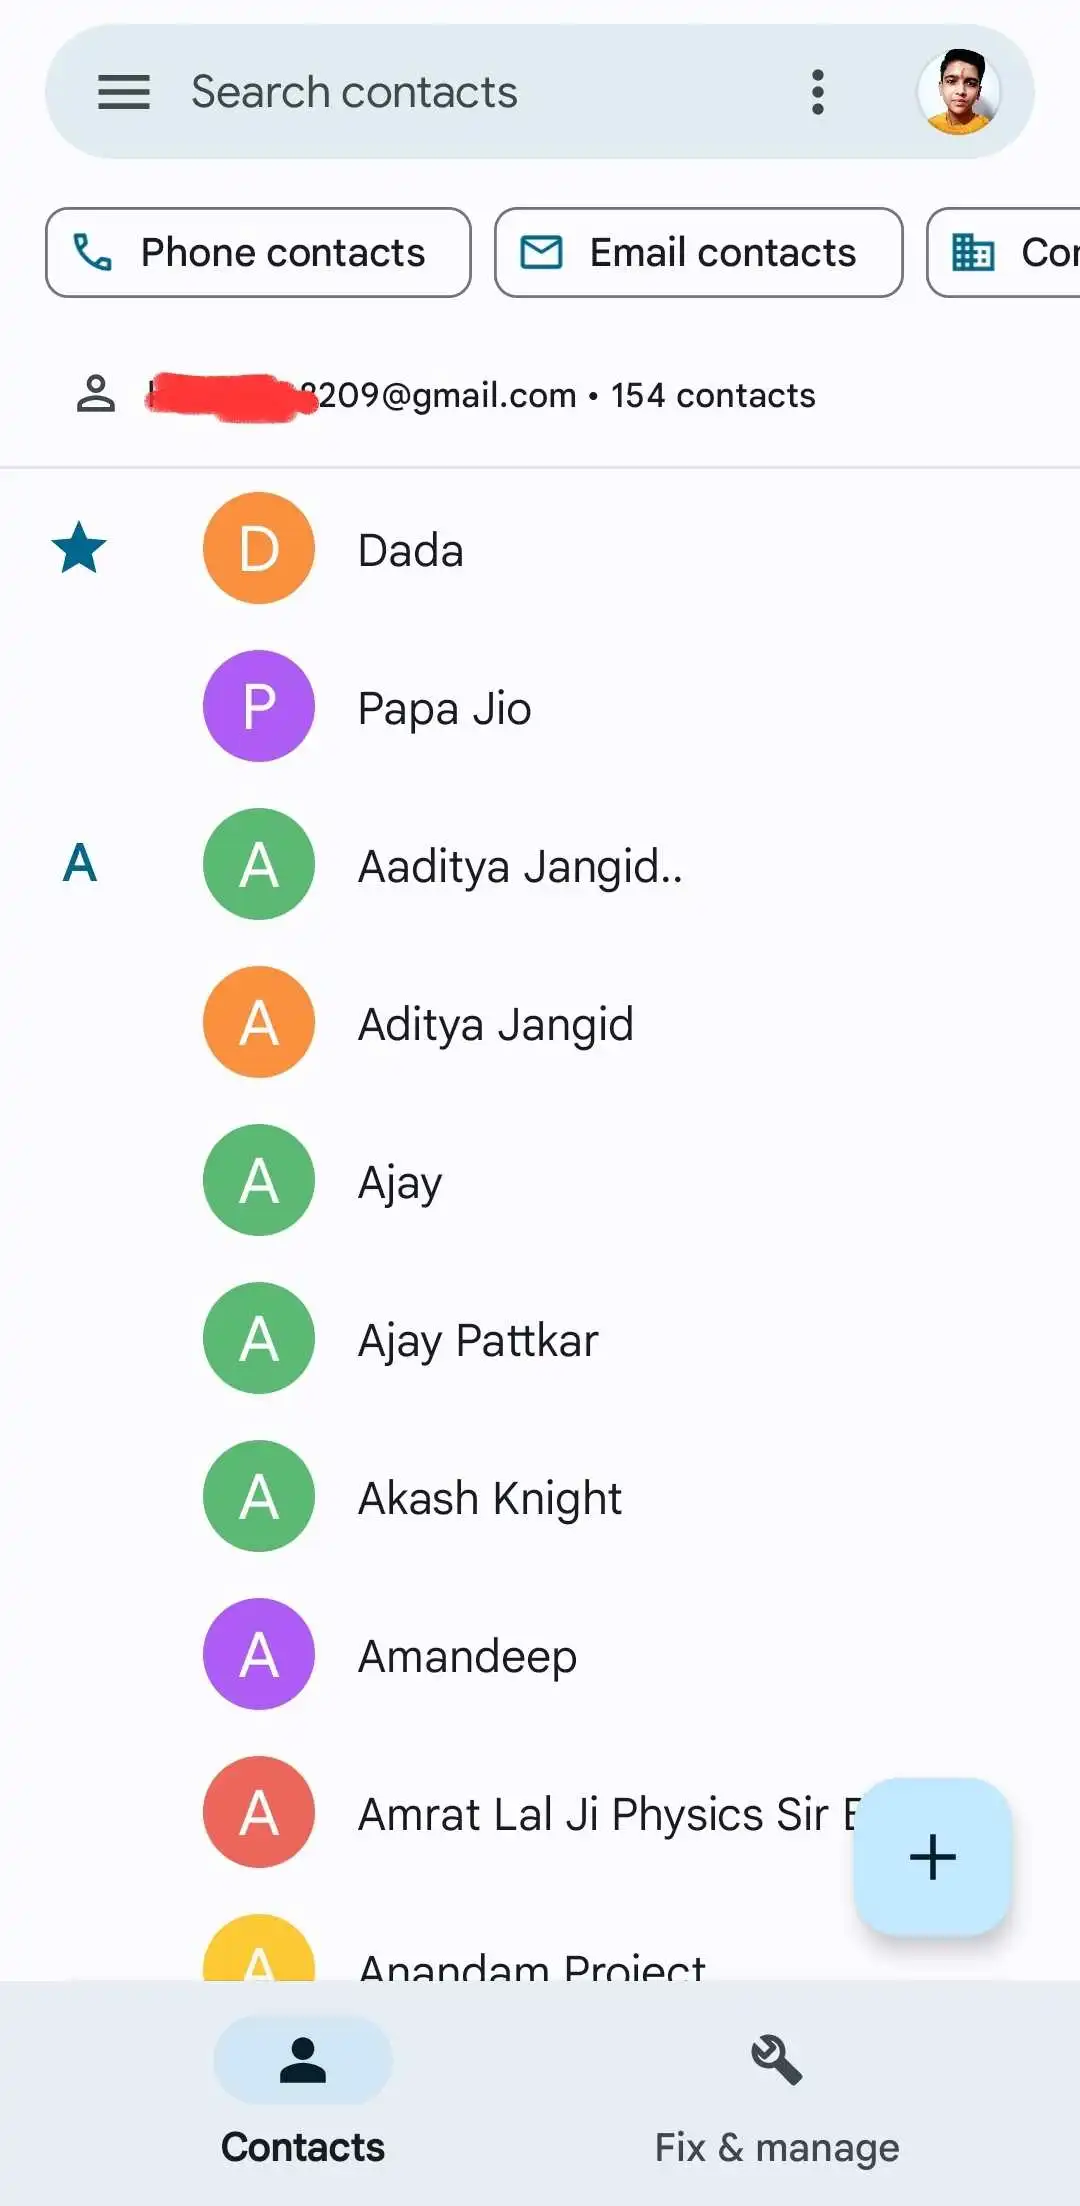
- Open the contacts app.

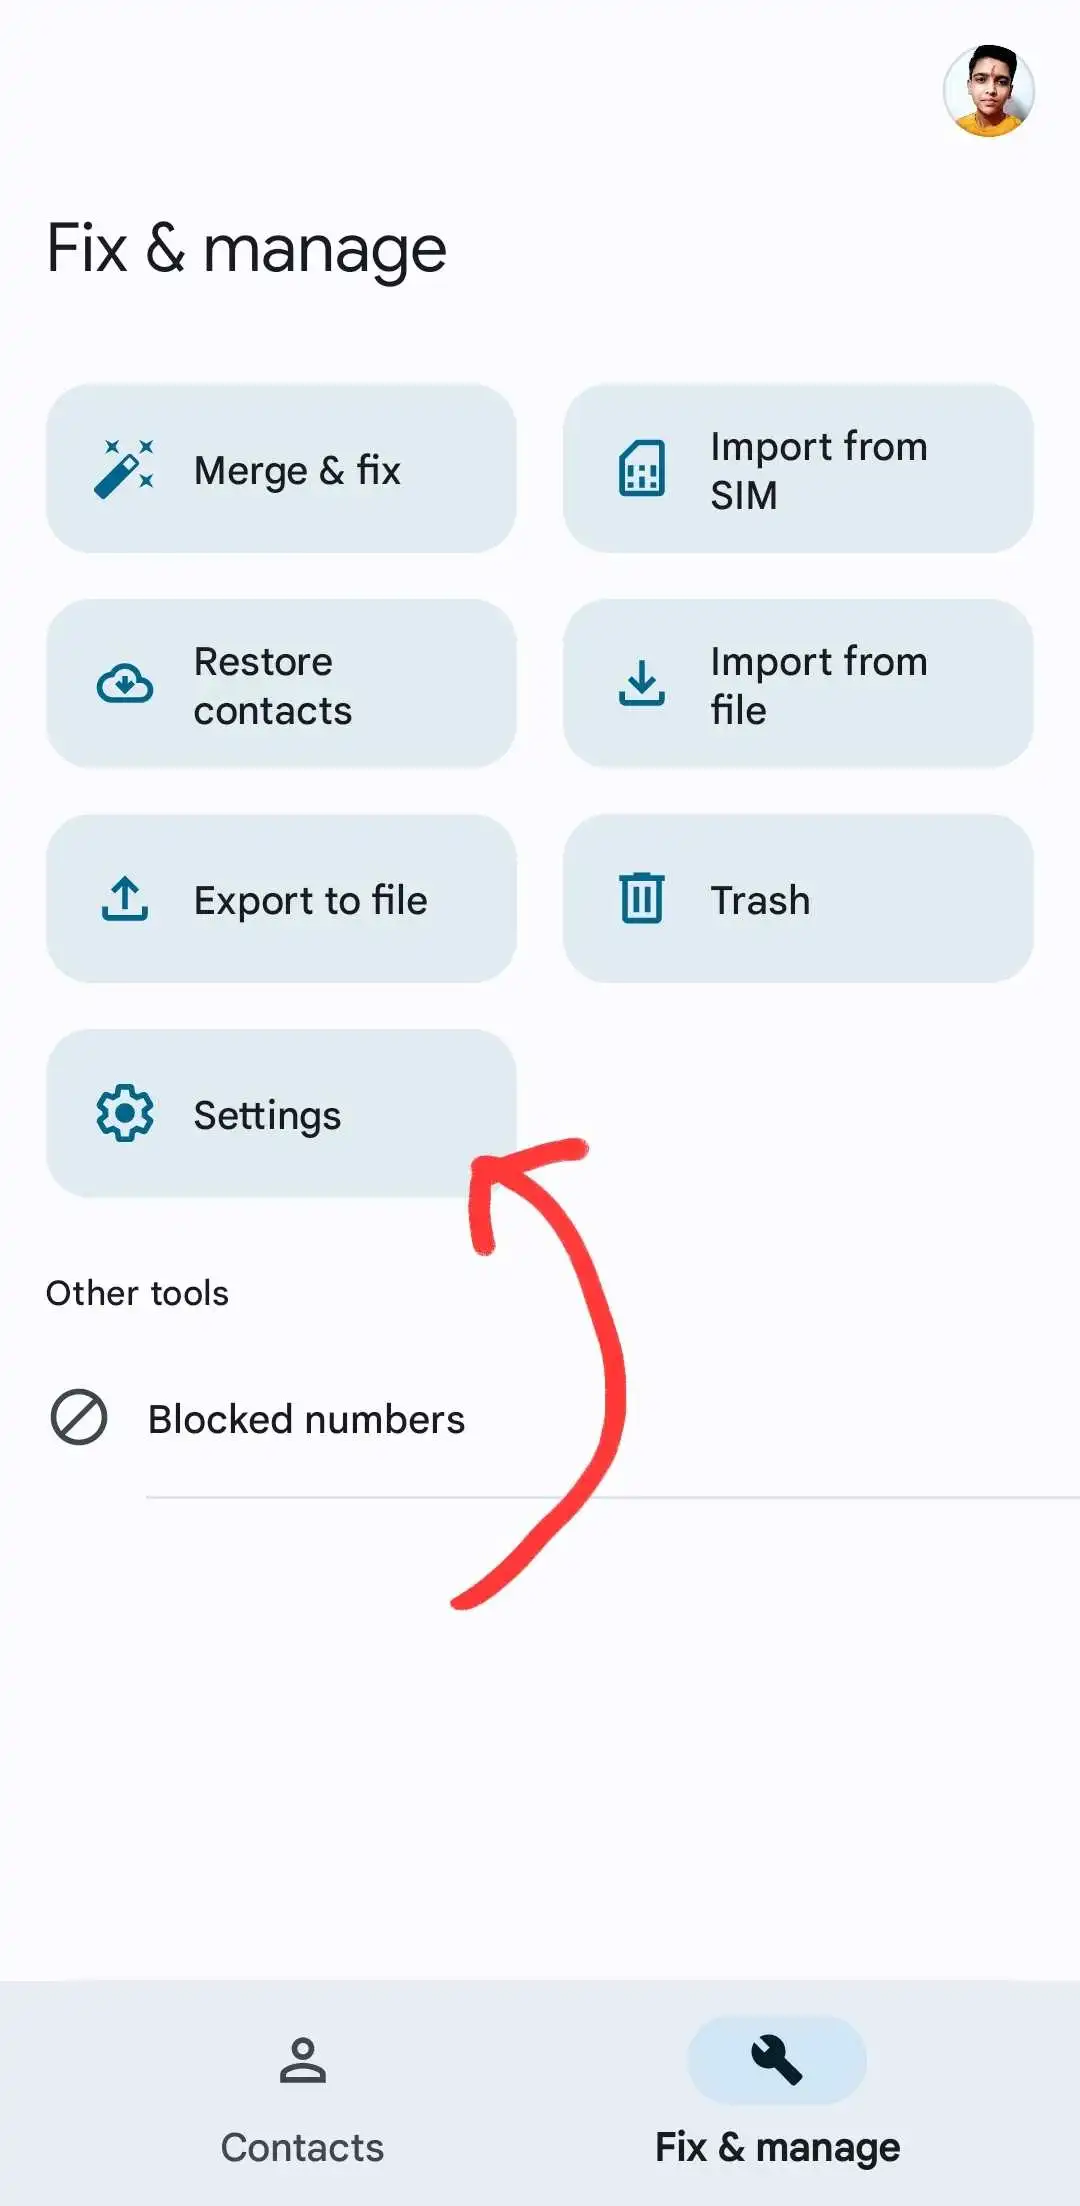
2. Tap on a fix and manage.
3. Then select the settings.
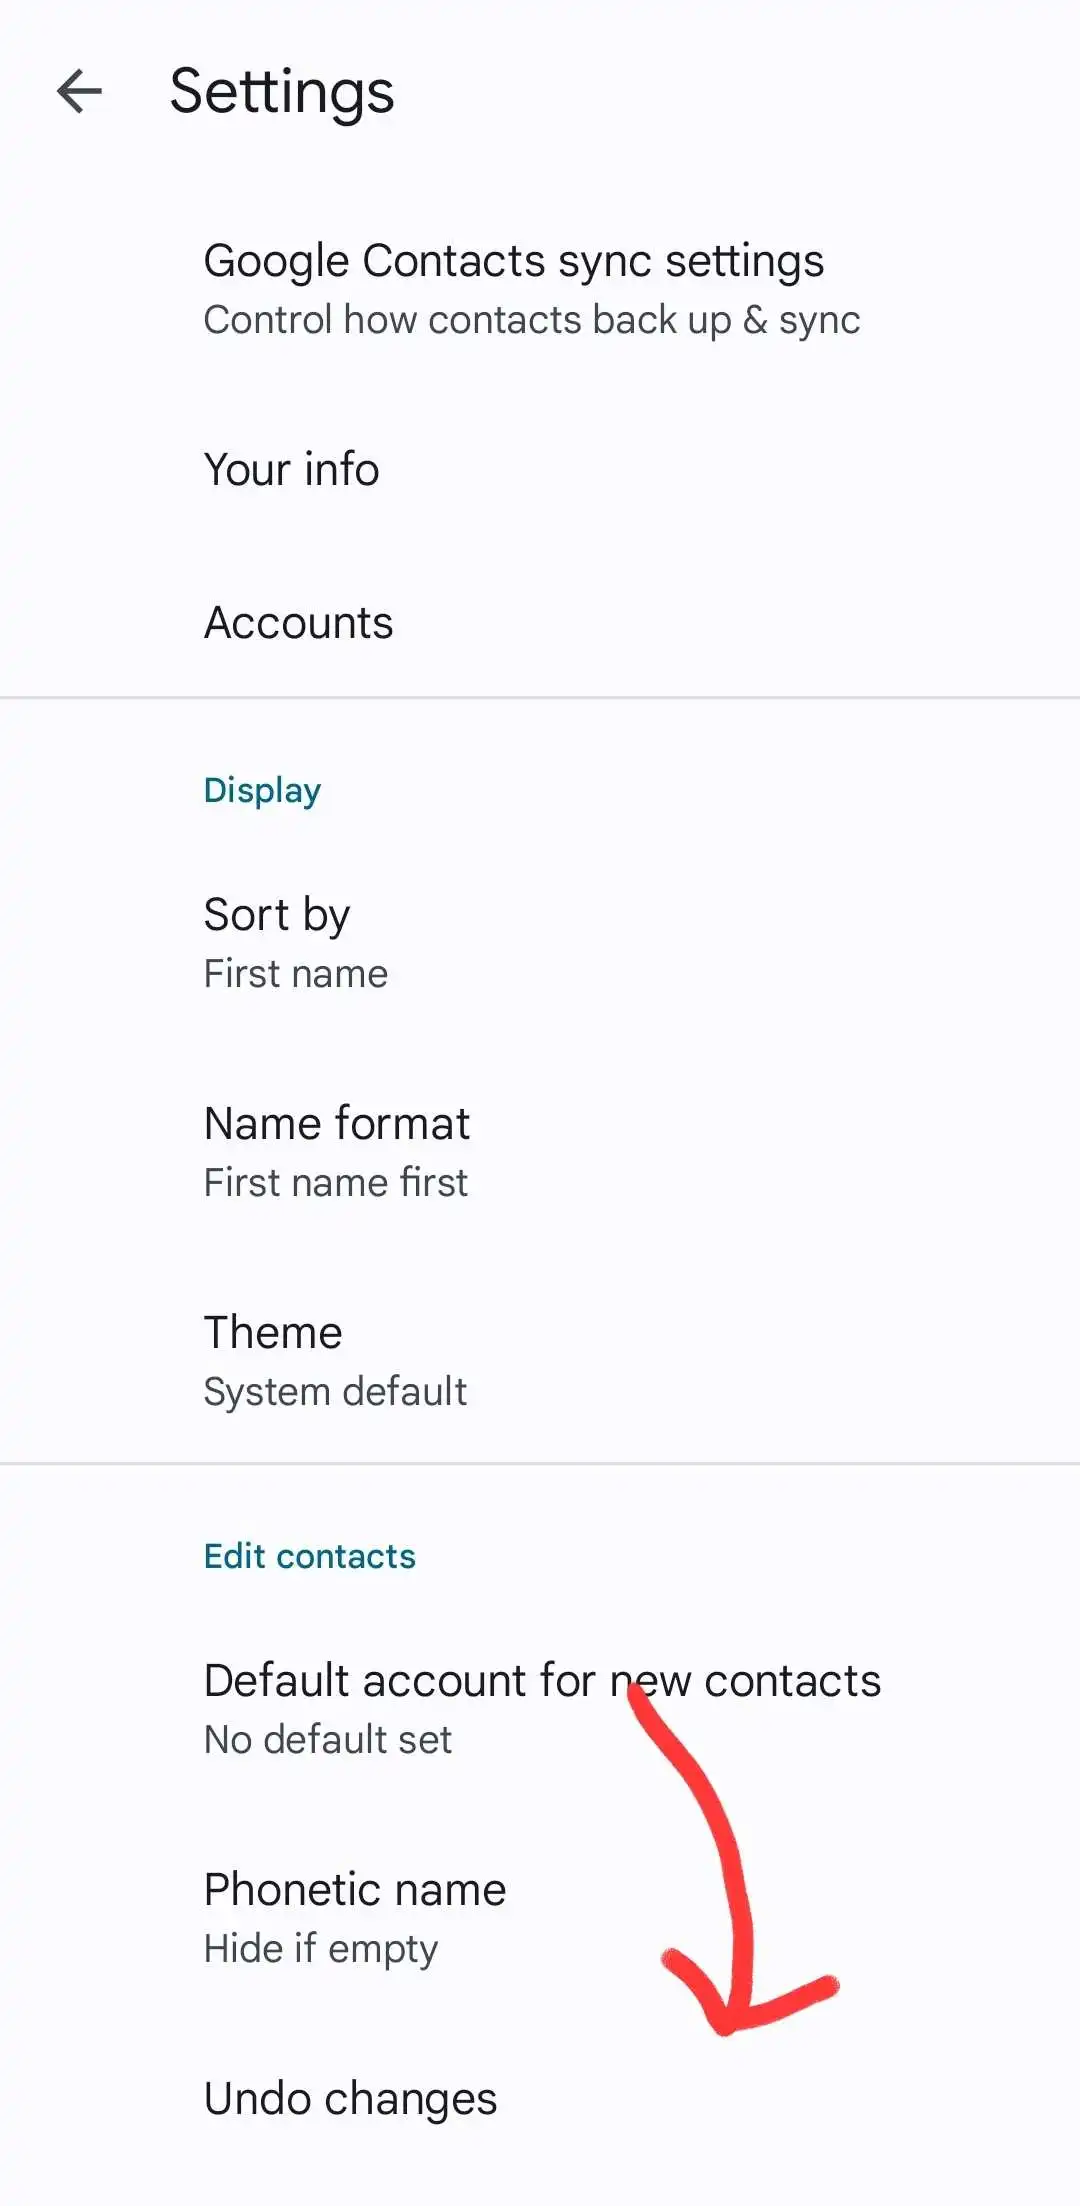
4. In settings, scroll down. Select Undo changes.
5. Select the time you want to remove the synced contacts here. The popup shows below the given time-lapse. Then hit confirm.
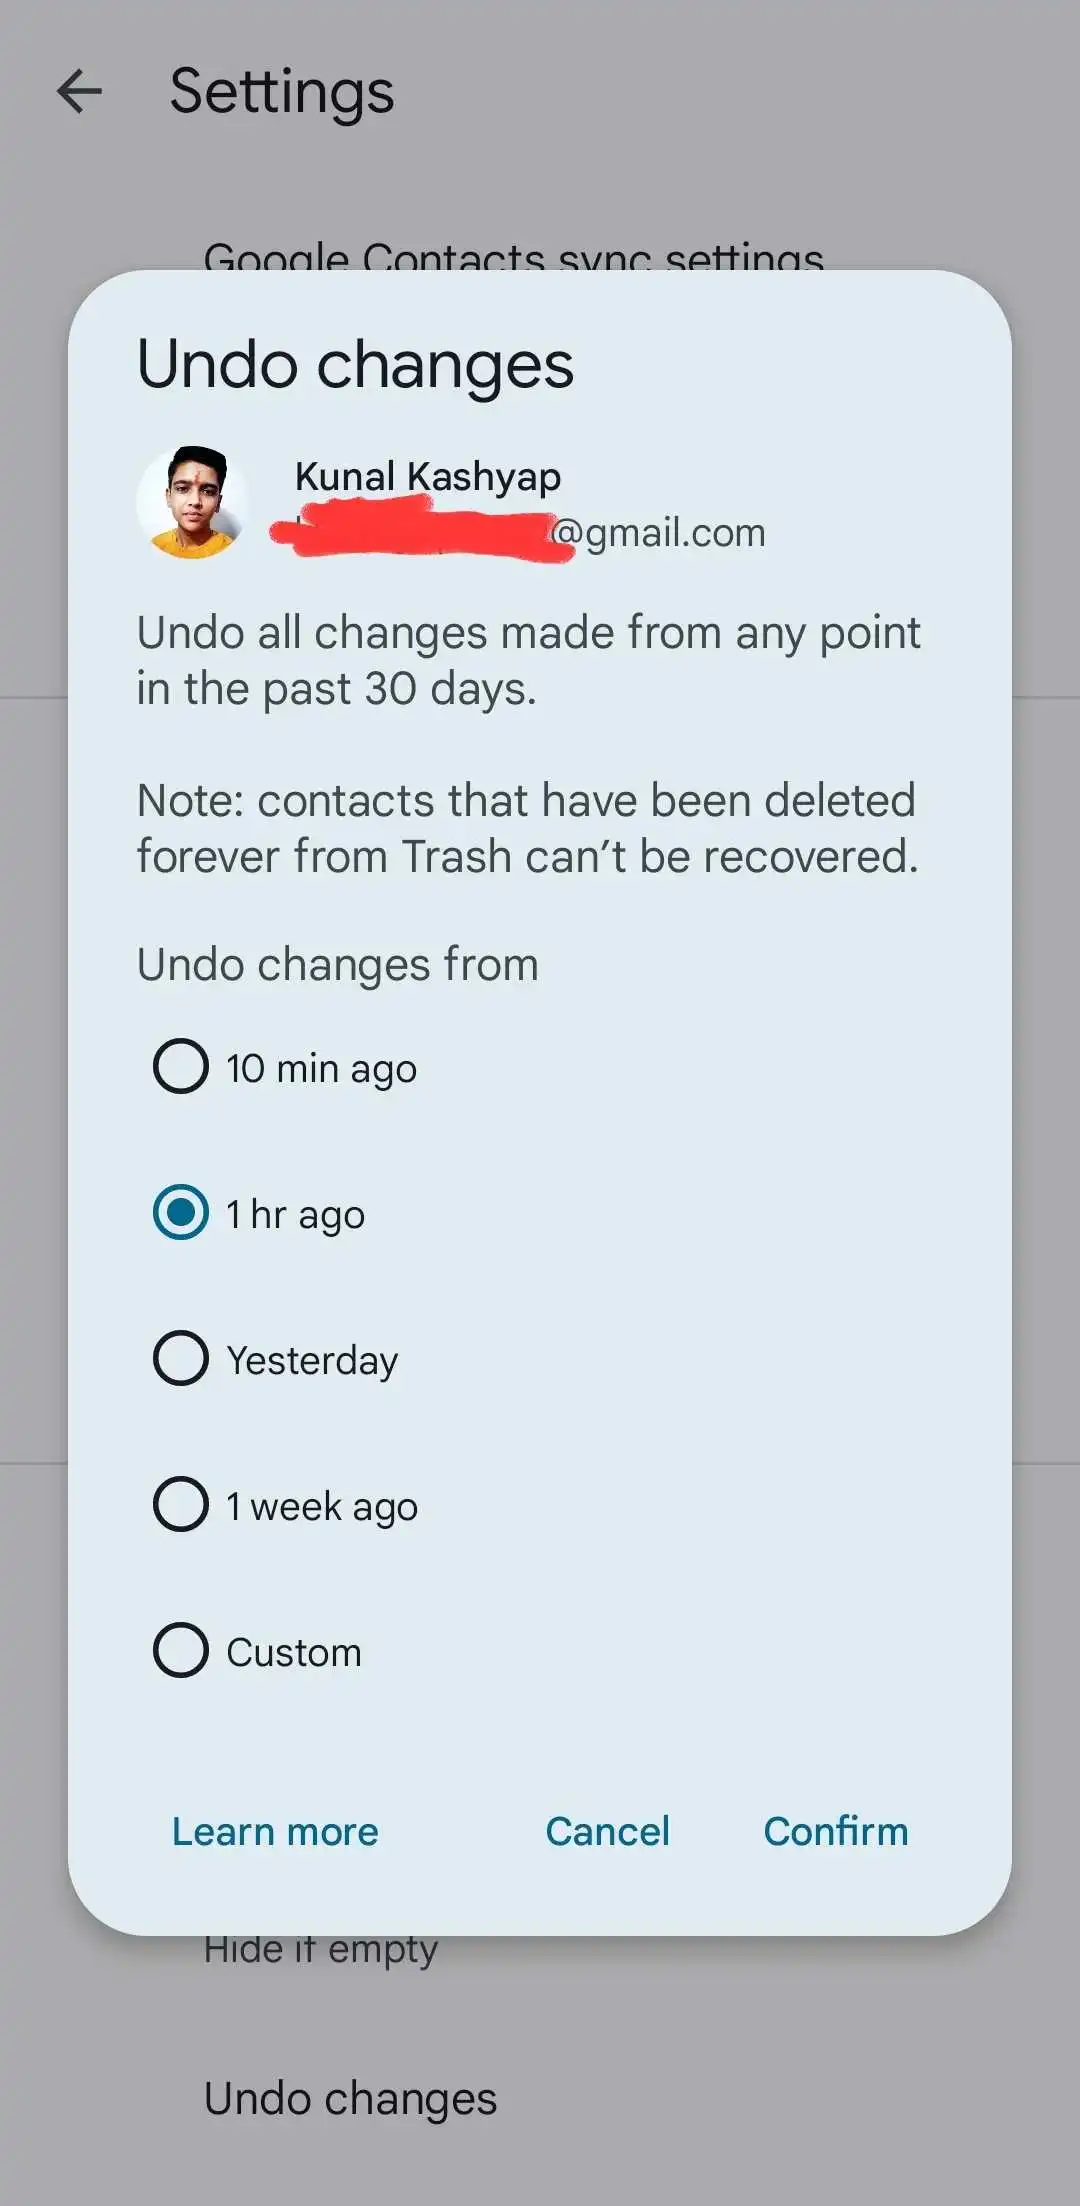
- 10 Minutes ago.
- 1 hour ago.
- Yesterday.
- One week ago.
- Custom.
Note: This removes and deletes all your changes in the contacts app. Suppose you mistakenly synced (added) some contacts you don’t want to. Then, you can undo those changes by going through the above changes.
Here are the key points to remove Gmail synced contacts from an Android phone:
- Open the Settings app on your Android device.
- Navigate to the “Accounts” or “Users & Accounts” section.
- Select your “Google” or “Gmail” account.
- Find “Contacts” in the list of synced items.
- Toggle off the switch next to “Contacts” to disable contact sync.
- Confirm your choice to remove unsync contacts from your phone.
Following these steps will remove Gmail synced contacts from your Android device.
Is it safe to undo changes on the Contacts app?
Yes, it is entirely safe because the app allows you to undo the changes you made. Select the time from which you want to undo the changes.
For instance, if you have synced the contacts on the last day, you can select “Yesterday” and confirm it.
Disable Contact Sync
There’s another way you can disable the sync for that Google account in that manner next time. You won’t get all those contacts to sync automatically in the background.
Note: It is for the people who want to avoid the same thing happening shortly.
- Open the Gmail app.
- Tap on your profile.
- Then tap Manage accounts on this device.
- Tap on your Gmail account.
- Select sync account.
- Turn off the contacts sync by toggling the blue button.
For instance, no contacts will be synced in the background when the sync button is turned off. It is like the permission for the device to get it synced.
What is the difference Between Gmail and Google Contact Sync?
Contact syncing for Google and Gmail is the same. Because all the Android Google accounts are contacts, it’s the same for Gmail. When it’s on, it is on for both Gmail and Google. In the end, Gmail is a product of Google.
Summing up everything I wrote above in Fixing Mostly’s way.
To undo the synced contacts and to remove them, Open the contact app, get into the settings, and then select undo changes. At last, please choose a time frame you have made the changes, then delete it.
To learn more about Google’s contact app, read this.
Conclusion
I hope you found the article helpful and helped get things done. We are FixItKunal, and your one comment can help us.